Configuring VoiceboxMD means adjusting the default settings to suit your requirements. For instance, you may wish VoiceboxMD to use templates to retain consistency in your transcripts and reduce duplication when creating transcripts.
In the Control Panel, you can also change your profile details and set up your microphone.
The Control Panel is also the first port of call for troubleshooting issues you may have with your transcriptions. For instance, if you are in a niche field you may wish to tell VoiceboxMD how to spell certain words or add obscure medical jargon to the built-in VoiceboxMD dictionary.
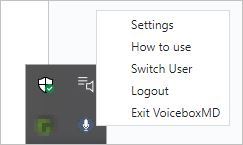
You can perform VoiceboxMD configurations by right-clicking on the VoiceboxMD icon in the Windows system tray and selecting Settings.
The Control Panel will be displayed. It has five tabs: Settings, Templates, Phrases, Transcripts and Vocabulary.
Below is a table summarizing the various settings options. Don’t be daunted – VoiceboxMD works perfectly well using the default settings. But, as you work with the app, you may like to customize it for your specific requirements, e.g. the language you will dictate in.
Below the table are some detailed instructions for making the most common configuration changes.
| Tab | Setting | About |
| Settings | General settings, like changing profile details and technical defaults | |
| Settings | Please contact VoiceboxMD if you wish to change your email address so we can confirm the change | |
| Settings | Microphone | Click Change Device to select a new microphone in Windows Sounds options |
| Settings | Password | It is recommended you change your password after logging in the first time with your temporary password allocated by VoiceboxMD |
| Settings | NAICS Code | NAICS stands for North American Industry Classification System where different codes are allocated to transcription services different industries, e.g. medical |
| Settings | CPM Delay | This option refers to the delay between receiving input audio and transcribing it to text; you may increase the time in seconds to allow VoiceboxMD more time to catch up with your audio |
| Settings | Change Language | Choose the language you use to dictate your transcripts |
| Settings | Turn on App Diagnostics | When troubleshooting issues, turn this option to view the app’s log files |
| Settings | Remote Desktop Mode | This option may help to troubleshoot unstable connections through a virtual machine, if you are using one |
| Settings | Fallback Recognition | It is recommended this option is turned out, but if the level of accuracy of your dictation is not what you expected, you may turn it on |
| Settings | Enable HUD | Heads-up Display predicts some of your options as you start dictating |
| Templates | List of existing templates and option to add new templates | |
| Phrases | Allows you to dictate phrases or words that may be difficult to understand or spell and specify how they should be transcribed | |
| Transcripts | List of existing transcripts and option to add new transcripts | |
| Vocabulary | Allows you to add difficult to spell words to VoiceboxMD’s internal dictionary |
Setting up your microphone #
You can change your microphone on the Settings tab in the Control Panel. In the Microphone section, click Change Device.
You will be redirected to the Sound configuration page in Windows Settings. Here you can choose your input device (microphone) and troubleshoot it if necessary.
Managing custom words in VoiceboxMD’s built-in dictionary #
Extending VoiceboxMD’s vocabulary in an ongoing process, but will make the application more powerful over time.
What words should you add? VoiceboxMD is pretty smart, but you may notice that some words you use regularly are misspelled. These are the new words you can teach VoiceboxMD.
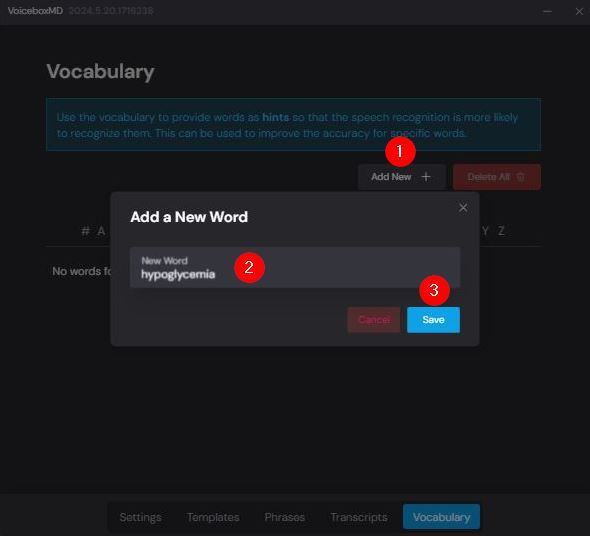
You can add new words to VoiceboxMD’s built-in dictionary on the Vocabulary tab in the Control Panel. To add a new word that VoiceboxMD will recognize and spell correctly when you use it, click on the Add New + button (1), enter the word you wish to save (2) and then click Save (3).
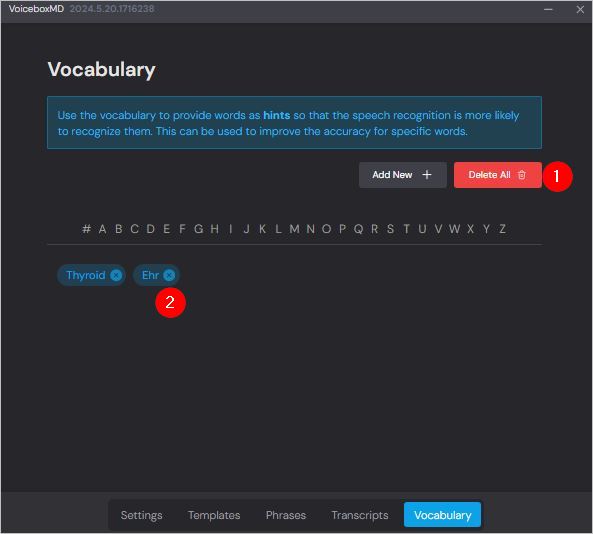
To delete all the custom words you may have added to VoiceboxMD’s dictionary, click Delete All (1).
To delete a single custom word, click on the X icon next to the word you wish to delete (2).
Managing templates to reduce duplicated dictation #
Templates allow you to insert chunks of text into your documents quickly, increasing efficiency and reducing duplicated effort. A simple, but useful, template is your contact details, something most medical professionals may have to type repeatedly during the course of a day.
To use a template during dictation, say, “Insert template [Your Template Name]*.
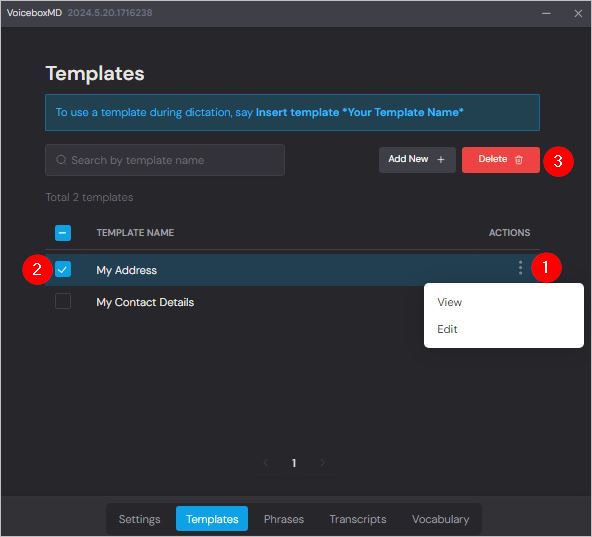
You can manage templates on the Templates tab in the Control Panel. To add a new template, click on the Add New + button.

To edit a template, click on the three dots in the ACTIONS column (1) and select Edit. To delete a template, select one or more templates (2) and then click Delete (3).
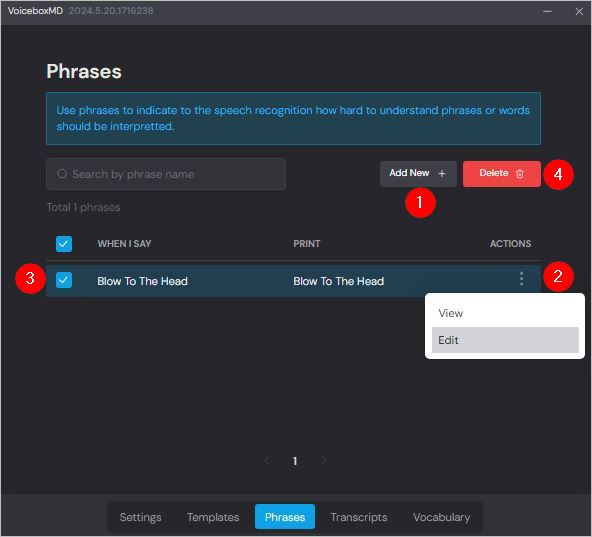
Managing phrases to reduce transcription errors #
You can capture audio for phrases you use commonly and that you notice VoiceboxMD sometimes transcribes incorrectly. You can do this on the Phrases tab in the Control Panel.
To add a new phrase, click on the Add New + button (1).
To edit a phrase, click on the three dots in the ACTIONS column (2) and select Edit.. To delete a phrase, select one or more phrases (3) and then click Delete (4).
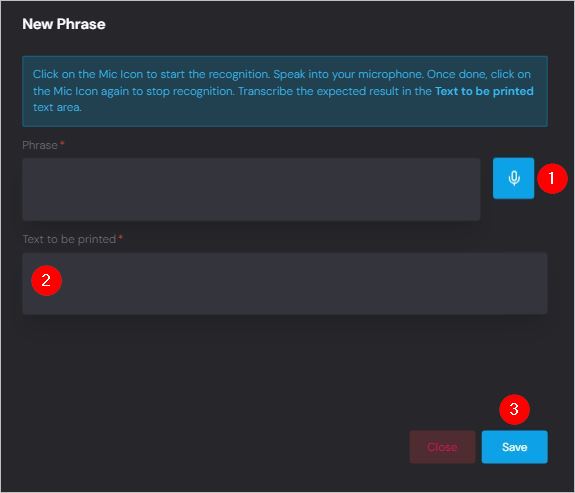
Recording a phrase #
Click on the microphone icon (1) to start the audio listener. Speak into your microphone. Once done, click on the microphone icon again to stop voice recognition. Type the expected result in the Text to be printed box (2). Click Save (3).
Tip: You can use phrases to create audio shortcuts for commonly-used sentences. For instance, you could teach VoiceboxMD to insert the words “First examination” when you say, “X1”.