- – A Doctor’s Guide to Daily Dictation
- 1. Signing In to VoiceboxMD
- 2. Getting Around: The Sidebar, Topbar, and Microphone Bar
- 3. Allowing Microphone Access in Your Browser
- 4. Creating Your First Dictation Note (Editor)
- 5. Starting and Stopping the Microphone
- 6. Choosing Where Your Voice Lands: Title vs. Note Body
- 7. Voice Commands for Punctuation, Numbers, and Layout
- 8. Saving, Copying, AI-Formatting, and Re-Opening Notes
- 9. Working with Templates and Fillable Fields
- 10. Personalizing Recognition: Phrases and Vocabulary
- 11. Recording Patient Encounters: Medical Scribe and Doctor–Patient Modes
- 12. Reviewing the Clinical Note and Generating a Super-Bill
- Appendix: Keyboard Shortcuts at a Glance
– A Doctor’s Guide to Daily Dictation #
A complete walkthrough of the VoiceboxMD browser app, from your first sign-in to finishing a clinical note and generating a super-bill. Written for clinicians; no technical setup required.
1. Signing In to VoiceboxMD #
VoiceboxMD runs entirely in your web browser. There is nothing to install. We recommend Google Chrome, Microsoft Edge, or Apple Safari on a desktop or laptop with a built-in microphone or a USB headset.
To sign in:
- Open your browser and go to your VoiceboxMD web address (the one provided by your administrator).
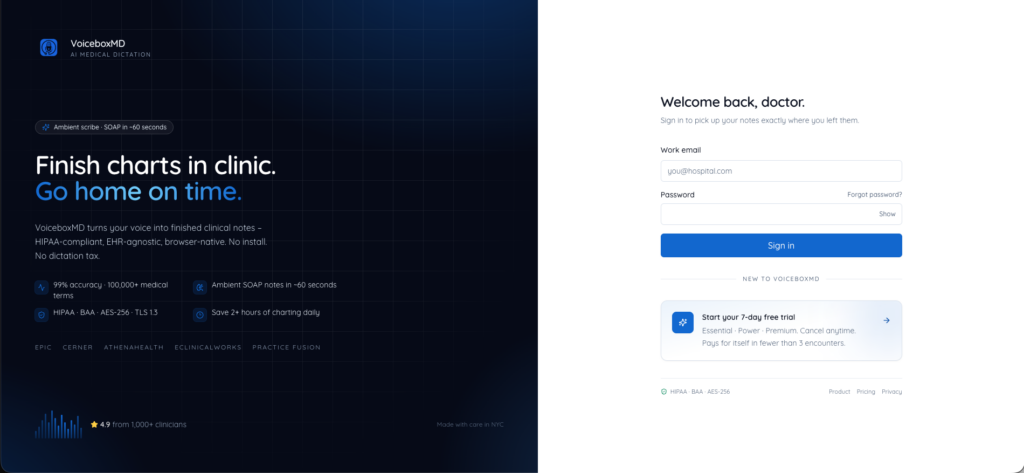
- On the Welcome back, doctor screen, type your work email into the Work email field.
- Type your password into the Password field. Click Show if you want to confirm what you typed.
- Click the blue Sign in button.
You will land on the Editor page, ready to dictate.
If you forget your password:
- On the sign-in screen, click Forgot password? above the password box.
- Enter your work email and click Send reset link.
- Open the email VoiceboxMD sends you. It contains a 6-digit verification code.
- When the app asks for it, enter the 6-digit code on the Enter your verification code screen and click Verify code.
- Set a new password on the next screen and you’re back in.
2. Getting Around: The Sidebar, Topbar, and Microphone Bar #
Once signed in, the app has three permanent areas that are always visible no matter which page you are on. Learning these three is the entire navigation system.
The left sidebar (main navigation). Click any item to switch pages.
- Editor — your daily dictation page. This is your home.
- Notes — every note you have ever created, in one list (dictations, medical scribe notes, doctor–patient notes).
- Medical Scribe — record a clinical encounter where you are the only speaker.
- Doctor–Patient — record a clinical encounter where both you and the patient are speaking. (Available on the Premium plan; appears with a Premium label if you don’t have access yet.)
- Settings — your profile, vocabulary, phrases, templates, note templates, and keyboard shortcuts.
- Admin — only appears for clinic administrators.
Your subscription level (e.g. Essential, Power, Premium) is shown right under the VoiceboxMD logo at the top of the sidebar.
The top bar. On the right side of the top bar you will find:
- A small sun/moon icon to switch between light mode and dark mode.
- Your email address.
- A Sign out button.
The microphone bar (very bottom of the screen). This is the single most important control in the app. It contains:
- The big Dictate / Stop button (turns red when you are recording).
- A live audio meter that shows green/blue bars rising and falling as you speak — proof that your microphone is working.
- A short status sentence describing what the app is doing right now (e.g. Listening — dictating into the body).
- A timer showing how long you have been recording.
- On the right, a small label such as 23 phrases which tells you how many of your saved voice phrases are active.
3. Allowing Microphone Access in Your Browser #
Before you dictate for the first time, your browser will ask permission to use your microphone. This only happens once.
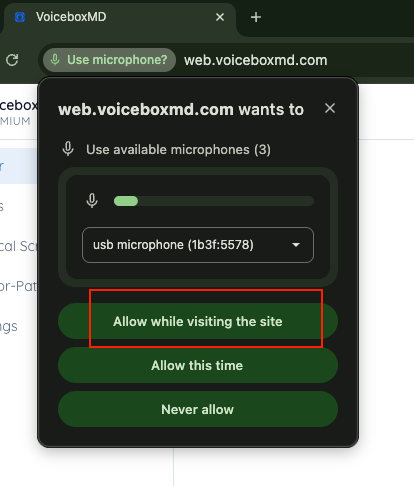
- Click the big Dictate button at the bottom of the screen.
- A small browser pop-up will appear near the address bar asking “VoiceboxMD wants to use your microphone.”
- Click Allow.
If you accidentally click Block, no worries — you can fix it any time:
- Chrome / Edge: Click the small lock icon in the address bar → Site settings → set Microphone to Allow → reload the page.
- Safari: Safari menu → Settings → Websites → Microphone → set the VoiceboxMD site to Allow → reload the page.
Tip: Use one good microphone. Built-in laptop microphones work, but a USB headset, a lapel mic, or the microphone on a quality webcam will give you noticeably better recognition – especially in a noisy clinic.
4. Creating Your First Dictation Note (Editor) #
The Editor is the page that opens when you sign in. It is designed to look like a clean sheet of paper. There are only two writing areas:
- The title bar at the top – enter the patient name, visit type, MRN, or anything else that helps you find the note later.
- The note body – the large white area below where the body of your note goes.
To the right of the title you’ll see four buttons that do everything you need:
- Template – insert one of your saved text templates.
- Copy – copy the entire note body to your clipboard (for pasting into your EHR).
- AI format – let VoiceboxMD rewrite your raw dictation into a clean, structured note.
- Save – save the note to VoiceboxMD.
A fifth ghost-style link, All notes, takes you to your list of saved notes.
To create a note from scratch:
- Click in the Untitled note field at the top and type or dictate a title (for example, Smith, J. — Follow-up – 04/25).
- Click anywhere inside the large note body below the title.
- Click the microphone button at the bottom and start dictating.
- When you’re done, click Save.
5. Starting and Stopping the Microphone #
The microphone bar at the very bottom of the screen is your one-stop control. It is always visible.
To start dictating: click the blue Dictate button. The button turns red, the label changes to Stop, and you’ll see the bars on the audio meter start moving as you speak. The timer next to the meter starts counting up.
To stop: click the red Stop button. Your last few words will be added to the note, and the timer resets.
A faster way (keyboard shortcut): press Cmd + Shift + M on a Mac, or Ctrl + Shift + M on Windows or Linux. This toggles the microphone on or off from anywhere in the app, without taking your hands off the keyboard. Many doctors use this to start and stop dictation between patients while keeping the chart open.
What the status messages mean:
- Connecting… – VoiceboxMD is opening a fresh voice channel. Usually under a second.
- Listening – dictating into the body – you are live; everything you say will appear in the note body.
- Listening – dictating into the title – you are live; everything you say goes into the title bar instead.
- Network interruption detected. Your microphone is still capturing audio locally – we will resume transcription automatically. Keep this tab open. – Your Wi-Fi blinked. Don’t panic; keep speaking. The app reconnects on its own.
Tip: Wait until you see the Listening message before speaking. The first half-second after clicking is reserved for setting up the voice channel.
6. Choosing Where Your Voice Lands: Title vs. Note Body #
VoiceboxMD always sends your spoken words to the field that you last clicked. This is called the dictation target.
- Click inside the title bar → your speech goes into the title.
- Click inside the note body → your speech goes into the note body.
You will see a thin blue ring around whichever field is currently the target. The status message in the microphone bar will say “dictating into the title” or “dictating into the body” so you always know.
A typical workflow looks like this:
- Click the title field.
- Click Dictate (or press
Cmd/Ctrl + Shift + M). - Say “Mrs. Garcia, post-op visit.”
- Click Stop.
- Click in the note body.
- Click Dictate again.
- Speak your full note.
- Click Stop.
- Click Save.
Tip: You can dictate the title and the body in one continuous session if you wish – just click between the fields without stopping the microphone.
7. Voice Commands for Punctuation, Numbers, and Layout #
You don’t need to touch the keyboard while dictating. VoiceboxMD understands a wide list of spoken commands and inserts the correct character automatically. Speak them naturally, in the middle of a sentence.
Punctuation: period, comma, semicolon, colon, question mark, exclamation mark (also exclamation point), full stop, hyphen, dash, slash, percent, plus, minus, equals, ampersand, asterisk, hash, underscore, times.
Brackets and quotes: open parenthesis, close parenthesis, open bracket, close bracket, open square bracket, close square bracket, open quote, close quote (also open quotation, close quotation).
Symbols often used in medicine: degrees celsius, degrees fahrenheit, degrees, plus or minus, micro (or mu), number sign, pound sign, at sign.
Layout:
- new line – moves to the next line.
- new paragraph – leaves a blank line and starts a new paragraph.
- backspace – deletes the last character.
- caps lock followed by a single word – capitalizes the next word (e.g. “caps lock urgent” → URGENT).
Numbers: Just say them naturally. “One hundred twenty over eighty” becomes 120/80. “Thirty seven point five degrees celsius” becomes 37.5°C. “Two thousand twenty four” becomes 2024.
Filling templates (more on these later): next field, previous field, prior field, clear field.
A worked example. If you say:
“Blood pressure one twenty over eighty period heart rate seventy two period temp thirty seven point five degrees celsius period new paragraph plan colon new line continue current medications period”
…the editor will record:
Blood pressure 120/80. Heart rate 72. Temp 37.5°C.
Plan: Continue current medications.
Tip: If automatic punctuation is turned on (Settings → Vocabulary), VoiceboxMD will also place periods and commas for you in normal sentences. The voice commands above are still respected and override the automatic guesses.
8. Saving, Copying, AI-Formatting, and Re-Opening Notes #
Once you have dictated, you have four main actions on the editor toolbar:
Save. Click Save (or press Cmd + S on Mac / Ctrl + S on Windows). You will see a green Note saved message and the app moves you into the saved note view, where the title bar now reflects what you saved. Saved notes live in Notes in the sidebar.
Copy. Click Copy. The full note body is placed on your clipboard. Switch to your EHR, click in the chart field, and press Cmd + V / Ctrl + V to paste.
AI format. Click AI format (or press Cmd + Shift + A / Ctrl + Shift + A) to have VoiceboxMD rewrite your dictation into a clean, structured clinical note. Use this when:
- You dictated a long stream of consciousness and want it organized.
- You want bullet points, headings, and consistent formatting.
- You want filler words and stutters removed.
A spinner appears on the button while the AI is working, and the body is replaced with the formatted version when finished. If you don’t like the result, just press Cmd + Z / Ctrl + Z in the note body to undo, or re-dictate.
Opening a saved note. Click All notes (or Notes in the sidebar). You will see every note you have ever created in one list, newest first, with:
- An icon and a colored label so you can tell types apart at a glance: Dictation, Medical Scribe, or Doctor–Patient.
- The note title and a short preview of the content.
- A relative timestamp like 2 hours ago.
- A trash-can button to delete that note.
Use the Search notes, clinical notes, recordings… box at the top right to find a note by title or by any words in its content.
Click any note to open it. From the note detail page you can edit the title or body, run AI format again, Copy, Save your changes, or delete it with the trash icon.
Tip: Even if you forget to give a note a title, VoiceboxMD will save it as Untitled note. You can always rename it later.
9. Working with Templates and Fillable Fields #
Templates let you insert blocks of pre-written text into a note in one click. They are perfect for repeated phrases – normal exam findings, common counseling, follow-up plans, procedure descriptions.
A template has two parts:
- A Command (a short name you’ll recognize, e.g. normal chest, URI advice, post-op shoulder).
- An Output (the actual text that will be inserted).
To use a template while writing a note:
- In the editor, click your cursor where you want the template to appear.
- Click the Template button on the toolbar (or press
Cmd + Shift + I/Ctrl + Shift + I). - A search box drops down. Start typing part of the command name.
- Click the template you want. Its full text is inserted at your cursor.
To create a new template:
- Go to Settings → Templates.
- In the New template card, type a short Command (for example, normal chest).
- Type or paste the Output — the full text you want.
- Click Add template.
Fillable fields (very useful for everyday notes). Anywhere inside an Output, you can write [[something]] and that becomes a fillable slot. For example:
Chief complaint: [[complaint]]
HPI:
– Onset: [[onset]]
– Duration: [[duration]]
– Severity: [[severity]]
Plan: [[plan]]
When you insert this template into a note:
- The first slot is automatically selected for you.
- Type or dictate to replace it.
- Press Tab to jump to the next slot, or Shift + Tab to go back.
- While dictating, you can also say “next field”, “previous field”, or “clear field” — no keyboard needed.
AI refine for existing templates. If you have an old EHR template you want to convert into a fillable VoiceboxMD template, paste it into the Output box and click AI refine. The app reads the text, finds the parts that change every visit (onset, severity, dose, vitals, etc.), and replaces them with [[fillable]] placeholders for you. If you don’t like the result, click Undo refine to put back exactly what you pasted.
10. Personalizing Recognition: Phrases and Vocabulary #
VoiceboxMD has two different ways to teach the app your voice habits. They live next to each other in Settings.
Phrases – spoken shortcuts #
Phrases let you say a short, made-up word and have VoiceboxMD type out a longer phrase. Common uses:
- Say “bpx” → type blood pressure.
- Say “sob” → type shortness of breath.
- Say “rxs” → type prescriptions.
- Say “pmh hyp” → type past medical history of hypertension.
To create one:
- Go to Settings → Phrases.
- In Input (spoken), type the short word you will say.
- In Output (expanded), type what should appear in the note.
- Click Add.
The mic bar at the bottom shows how many phrases are currently active (e.g. 23 phrases) so you always know they are loaded.
Vocabulary – words the app should never mishear #
Vocabulary tells the speech engine which uncommon words to listen for: rare medications, eponyms, sub-specialty terminology, and your most-misheard patient surnames. You can save up to 100 terms.
To set up your vocabulary:
- Go to Settings → Vocabulary.
- Pick your Language (US, UK, Canada, Australia, India English).
- Type your Discipline (e.g. Cardiology, Family Medicine, Orthopedic Surgery).
- Optionally enter a NAICS code (used for billing/reporting; ask your administrator).
- Tick Add automatic punctuation if you want VoiceboxMD to insert periods and commas for you in normal sentences. Untick it if you prefer to dictate every punctuation mark yourself.
- In the Vocabulary box, type a term and press Enter (or click Add) to save it. Repeat for as many as you need (up to 100).
- Click Save at the bottom right.
A counter shows how many of your 100 slots are used and how many remain. Click the trash icon next to any chip to remove it.
[Screenshot suggestion: the Vocabulary page with Language and Discipline at the top, the “Add a medical term…” box, and a row of saved terms shown as removable chips.]
Tip: Phrases are for short verbal shortcuts that should expand into a longer phrase. Vocabulary is for single words the app should recognize correctly when you say them. Use both: phrases save typing, vocabulary improves accuracy.
11. Recording Patient Encounters: Medical Scribe and Doctor–Patient Modes #
For full clinical encounters, VoiceboxMD offers two specialized recording modes that produce a finished, structured clinical note at the end – not a raw dictation.
When to use which #
- Medical Scribe (solo) – you are the only speaker. You narrate the encounter for the record, either while seeing the patient or shortly after. Great for procedures, brief encounters, and any time the patient is not contributing to the dictation.
- Doctor–Patient (ambient) – both you and the patient are speaking. Place the device between you. VoiceboxMD records the natural conversation and automatically separates the speakers. Great for full new-patient histories and follow-up visits. (Available on the Premium plan.)
How a recording session works #
The flow is the same for both modes; the only difference is whether one or two speakers are recorded.
- In the sidebar, click Medical Scribe or Doctor–Patient.
- At the top of the page you will see a header with the mode name and a one-line description.
- In the title field, type a meaningful title – by default it’s Encounter [today’s date and time]. Replace it with the patient’s name or visit type.
- Open the Note template… dropdown next to the title and pick the structure you want for the final clinical note. Common ones include SOAP, H&P, Progress, and BIRP. Templates marked (system) are built-in by VoiceboxMD; the rest are yours from Settings → Note templates.
- Click the Dictate button at the bottom of the screen to start recording. (The button is labelled Record scribe or Record ambient depending on the mode.)
- As you (and the patient) speak, transcribed sentences appear in the Live transcript panel below in real time. A red dot pulses at the top of the page while recording, and a timer counts up.
- When the encounter is done, click the same button (now labelled Stop scribe / Stop ambient) to stop recording.
- (Doctor–Patient only) A new Label speakers box appears once two or more voices are detected. For each speaker (Speaker 1, Speaker 2, etc.), use the dropdown to label them as Doctor or Patient. You can leave one unassigned if you prefer.
- Click Finalize in the top right of the recording card. VoiceboxMD uses the chosen note template to build a structured clinical note from the transcript and opens it for review.
What to do if your internet drops #
If your Wi-Fi flickers during a recording, you’ll see a yellow message: “Network interruption detected. Your microphone is still capturing audio locally – we will resume transcription automatically. Keep this tab open.” Just keep speaking. Don’t close the tab. VoiceboxMD will resume the live transcript on its own.
Note templates for scribe sessions #
The structures you can pick from the Note template dropdown are managed in Settings → Note templates. You can:
- Use the built-in System templates (SOAP, H&P, Progress, etc.) as they are.
- Add your own Custom templates, each with a Name, a Description, and a Prompt describing how the AI should structure the final note (for example: “Use SOAP structure but include a separate Family History subsection under Subjective.”).
Tip: Note templates apply only to Medical Scribe and Doctor–Patient sessions. For pasting blocks of pre-written text into a regular dictation note, use the Templates tab (Section 9) instead.
12. Reviewing the Clinical Note and Generating a Super-Bill #
After you click Finalize at the end of a recording session, VoiceboxMD opens the Clinical note page. This is your structured, ready-for-EHR document.
What you see #
- The title of the encounter at the top – editable.
- A small badge to the right of the title showing the note status (e.g. final · solo or final · ambient).
- The clinical note itself, broken into editable sections that depend on the template you chose. For SOAP: Subjective, Objective, Assessment, and Plan. Each section may contain sub-fields the AI filled in (e.g. Onset, Severity, Vitals).
- A Details card on the right showing the type, status, and which note template was used.
- A Preview (plain text) drawer at the bottom that shows the entire note as one block of plain text, ready to copy.
Editing the note #
Click directly into any section box and type or dictate. To dictate into a section, click inside the section and use the microphone bar at the bottom as usual. When you’re done, click Save at the top right. A green Saved message confirms the change.
Copying to your EHR #
You have three levels of copy:
- Copy note in the top toolbar copies the entire clinical note as one block of clean plain text.
- A small copy icon at the top of each section copies just that section (Subjective, Objective, etc.).
- A small copy icon next to individual fields copies just that field’s value (handy for filling discrete EHR boxes).
Click the section header’s copy icon, switch to your EHR, and paste with Cmd + V / Ctrl + V.
Generating a Super-Bill #
To get billing codes for the encounter, click the Super-bill button at the top right of the clinical note page. After a few seconds, a Super-bill card appears below the note with:
- The recommended E/M Level and a written rationale for it.
- A CPT Codes table – each row shows the code, description, primary/secondary status, and a confidence label (high / medium / low). Click the small copy icon next to any code to copy just that code.
- An ICD-10 Codes table in the same format.
- A yellow Documentation Gaps box if the AI thinks anything important is missing from the note (for example, “No assessment of suicide risk documented”). Each gap has a short suggestion you can act on.
- A Copy all button at the very top of the super-bill that copies the entire bill (E/M, CPT, ICD-10, gaps) as one block of plain text.
Deleting #
If you need to discard a note, click the trash icon in the top toolbar and confirm. Deleted notes are removed from your Notes list immediately.
Tip: Documentation gaps are suggestions, not blockers. You can decide whether to address them, edit the note, save, and then re-generate the super-bill if you want updated codes.
Appendix: Keyboard Shortcuts at a Glance #
You can find this same list at any time inside the app under Settings → Shortcuts. Mac uses ⌘ (Command). Windows and Linux use Ctrl. Detection is automatic.
| What it does | Mac | Windows / Linux |
|---|---|---|
| Start or stop the microphone (works anywhere) | ⌘ + Shift + M | Ctrl + Shift + M |
| Save the current note | ⌘ + S | Ctrl + S |
| Run AI format on the current note | ⌘ + Shift + A | Ctrl + Shift + A |
| Open the Template picker | ⌘ + Shift + I | Ctrl + Shift + I |
| Jump to the next fillable field | Tab | Tab |
| Jump to the previous fillable field | Shift + Tab | Shift + Tab |
| Close any open pop-up | Esc | Esc |