Table of Contents
VoiceboxMD makes transcription easy on your Mac. Let’s get you set up and running smoothly with a few simple adjustments.
Tip: Spend some time familiarizing yourself with VoiceboxMD. Running a few test transcriptions can help you spot and fix any errors, fine-tuning the system for better accuracy.
Opening VoiceboxMD #
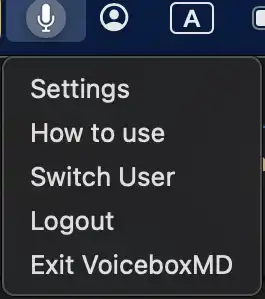
Double-click the VoiceboxMD app icon on your desktop to open the application. To access the VoiceboxMD Control Panel on your Mac, click the VoiceboxMD icon in the Top Bar and select Settings.
Before you start transcribing, check these settings:
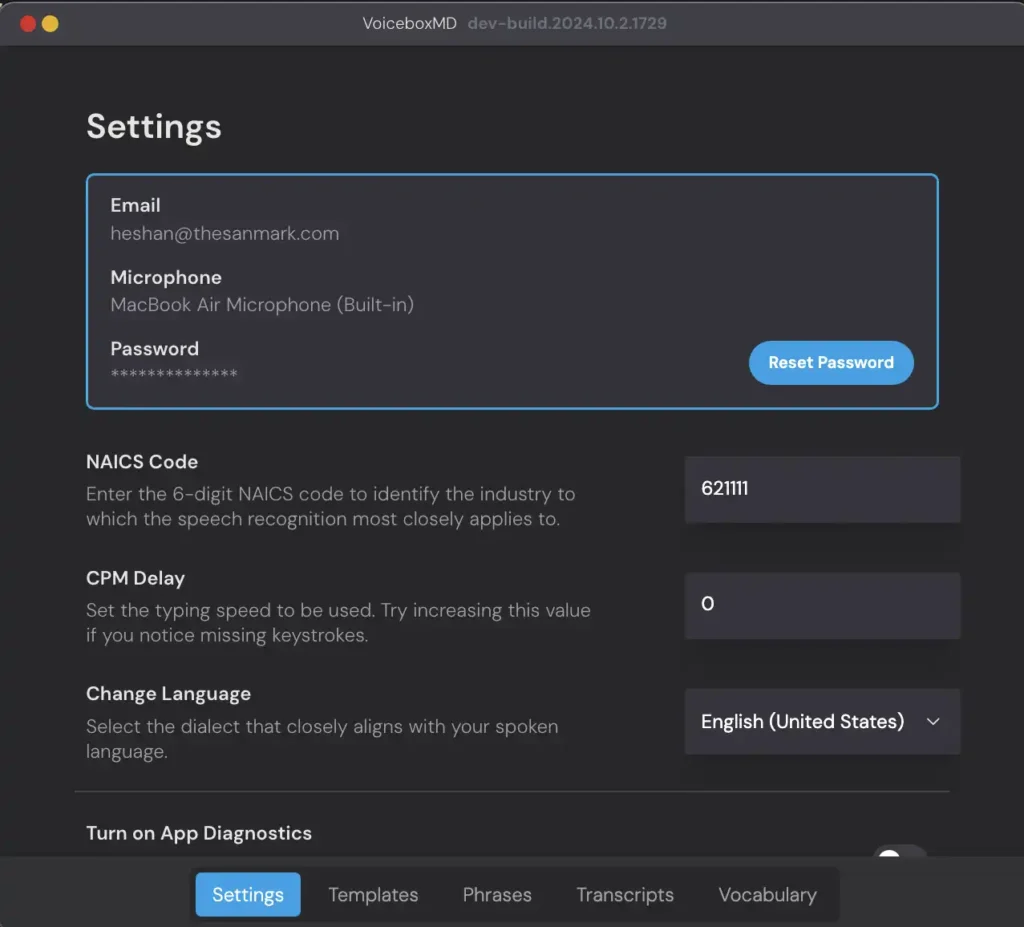
- Microphone Selection: Click on the VoiceboxMD icon in the Top Bar and select Settings. Under the Settings tab, choose your preferred input device from the list of available microphones.
- Language and Input Settings: In the Settings tab, ensure your language settings are correct under the Language section to match the language you’ll be transcribing.
Workflow for Transcribing Audio #
Follow these steps to transcribe audio into text efficiently:
- Open the document where you want to transcribe the audio. This can be in any text editor or word-processing application.
- With the document open, click the microphone icon on the VoiceboxMD interface to activate and begin speaking.
- Place the cursor in the document where you would like VoiceboxMD to begin transcribing your audio. The application will capture your speech and transcribe it into an open document.
- Once you finish speaking, click the microphone icon again to deactivate VoiceboxMD. Make sure to switch back to your document to continue editing or add more text.
To improve the accuracy of VoiceboxMD: #
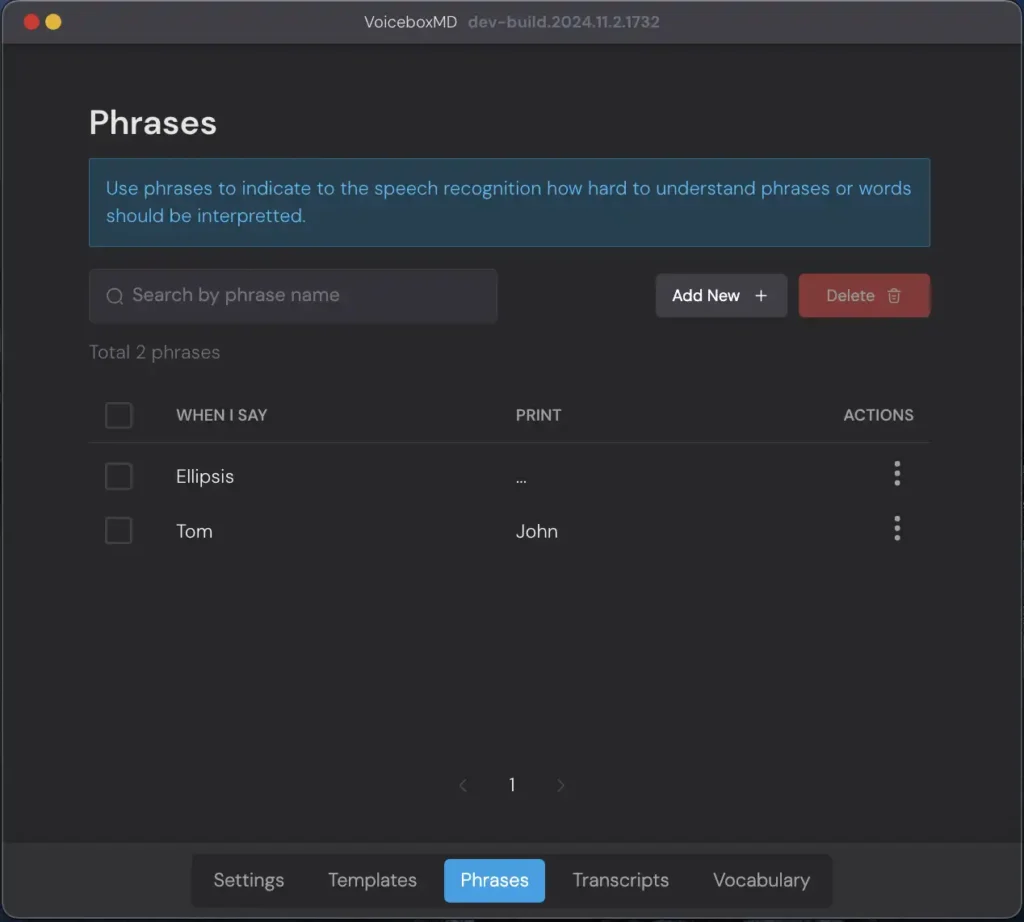
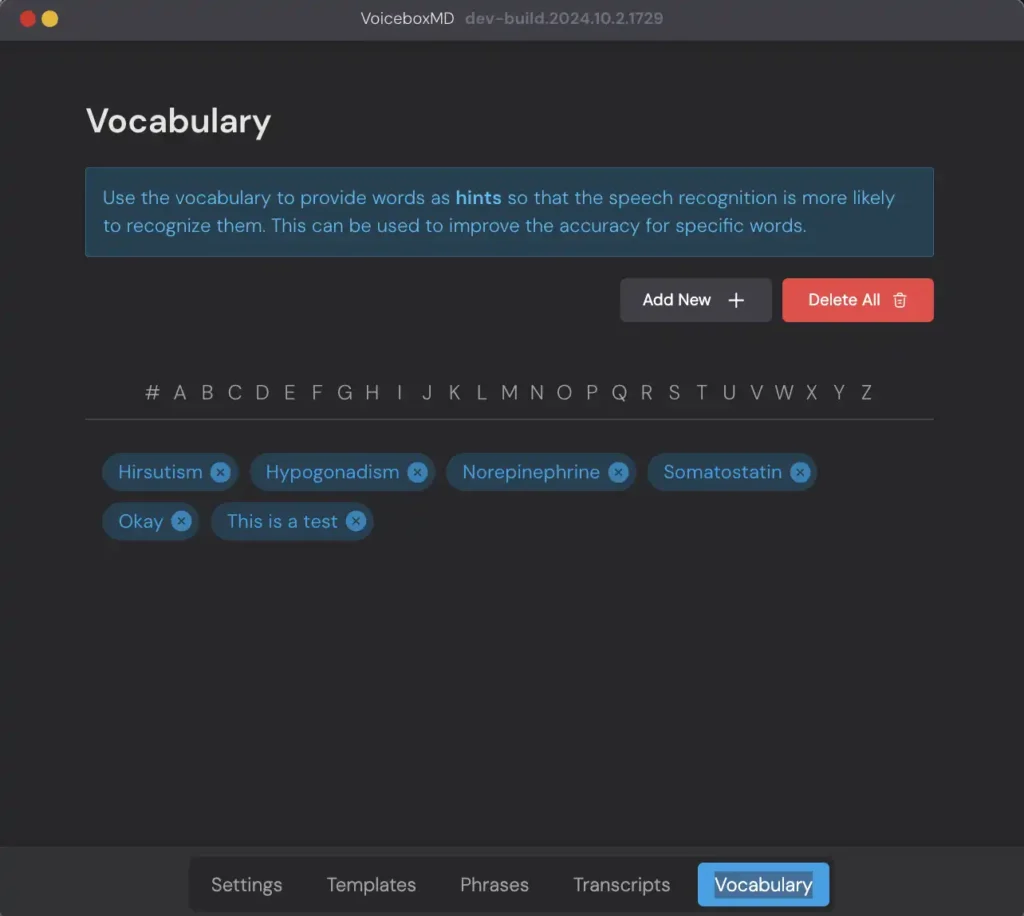
- Regularly review sections of your transcript where errors occur frequently. This could involve adding new phrases or correcting existing ones through the Phrases tab in the VoiceboxMD Settings. Add industry-specific terms and correct spelling errors in the Vocabulary tab within VoiceboxMD settings to customize the dictionary.