Here’s what you need to know to get started with VoiceboxMD’s main features on your Mac.
You can access different features, and functions of VoiceboxMD from two main areas:
- Main Interface: Move or hide the interface, and start or stop dictation.
- Top Bar: Click the VoiceboxMD icon in the top bar to access settings, log out, and other options.
Navigating the app interface #
Once you’re logged in, you can:
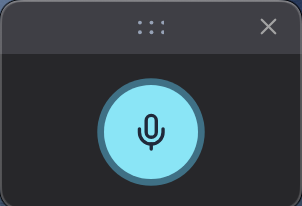
- Move the interface.
- Close the app.
- Start dictating.

We recommend positioning the VoiceboxMD interface on a neutral background or at the top of your screen to ensure it doesn’t interfere with your workflow. Double-click the Move symbol to switch between full-screen mode and standard size.
To begin dictating, simply click on the microphone icon. The icon will turn blue and pulse, showing it is active and ready to capture your voice.
Tip: Before you begin dictating, have a document open and ready. This ensures that VoiceboxMD knows exactly where to enter the text.
Additional Features and Functions #
VoiceboxMD provides several advanced features available through the VoiceboxMD icon in the top bar. Here’s an overview of what you can do:

Changing General Settings #
To access the VoiceboxMD Control Panel, click the VoiceboxMD icon in the top bar and select Settings. In the Settings tab, you can:
– Choose the language you want to dictate in.
– Update your password.
– Adjust other technical settings to improve your experience.
Getting Help and Support
For help, click the VoiceboxMD icon in the top bar and select How to Use. This will provide helpful tips and instructions for using VoiceboxMD.
For additional support, contact VoiceboxMD at support@voiceboxmd.com.
Switching Users #
This allows administrators to test users’ support queries. Additionally, it allows businesses to customize various settings according to the different accents.
To switch users, click the VoiceboxMD icon in the top bar and select Switch User.