You can use VoiceboxMD to create transcripts in three ways:
Create transcripts, Fill out EHR forms from the beginning, use pre-written templates, or transcribe from pre-recorded audio files. The processes for the first two scenarios are the same.
Dictating a New Transcript or Filling in a Form #
The same steps apply whether you’re transcribing into a word processing document like Pages or MS Word, or filling in an EHR application form like Athena Health EHR.
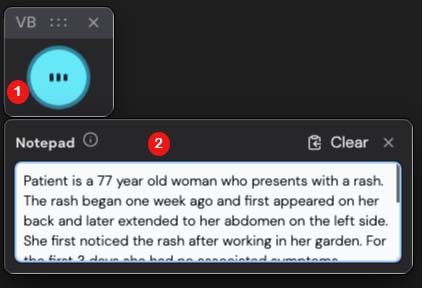
Before starting a new note in your EHR, you need to click the mic icon to start dictation (1), then start speaking. Your dictation will first appear in the VoiceboxMD Notepad (2).
Note: If the VoiceboxMD Notepad does not appear when you start dictation, it may be disabled in your settings.
Enabling the VoiceboxMD Notepad #
To enable the VoiceboxMD in-built Notepad:
- Open VoiceboxMD Settings.
- Toggle Enable Notepad to ON.

Once enabled, the Notepad will appear alongside the microphone icon and can be used for live transcription before inserting text into your EHR or document.
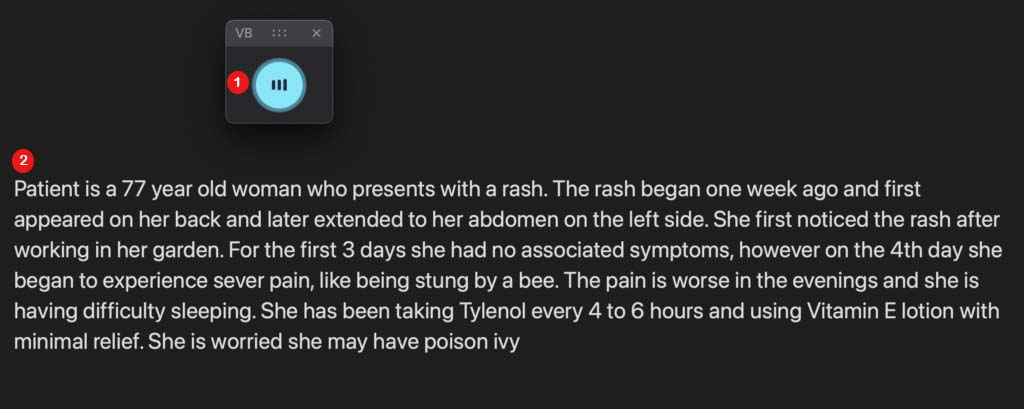
When you are ready to insert simply click on a text field in your EHR or Word document (2), and say “INSERT”. The dictated text will automatically appear on the text field as shown below.
You can fix mistakes during the transcription process or after you have completed it and turned off the microphone.
Step 1 – Specify where the audio must be transcribed #
Before starting a dictation, open the file where you want the transcription to appear—this could be a word-processing document or an EHR form. Place your cursor in the exact spot where you want VoiceboxMD to begin typing. Once your cursor is positioned and VoiceboxMD is activated, transcription will start at that location.
Step 2 – Start dictating your audio #
To begin transcribing, click the microphone icon in the VoiceboxMD interface. The icon will turn blue, indicating that VoiceboxMD is actively listening. When you’re finished, click the microphone icon again to stop.
VoiceboxMD supports a variety of text formatting commands, such as periods, commas, new lines, hyphens, and numbered lists.
To improve accuracy, you can customize VoiceboxMD’s understanding of specific words, phrases, and audio recognition capabilities through the Control Panel. You can set up templates to easily add frequently used content, such as your contact information.
Creating a Transcript from a Pre-Recorded Audio File #
VoiceboxMD is capable of transcribing audio from pre-recorded files.
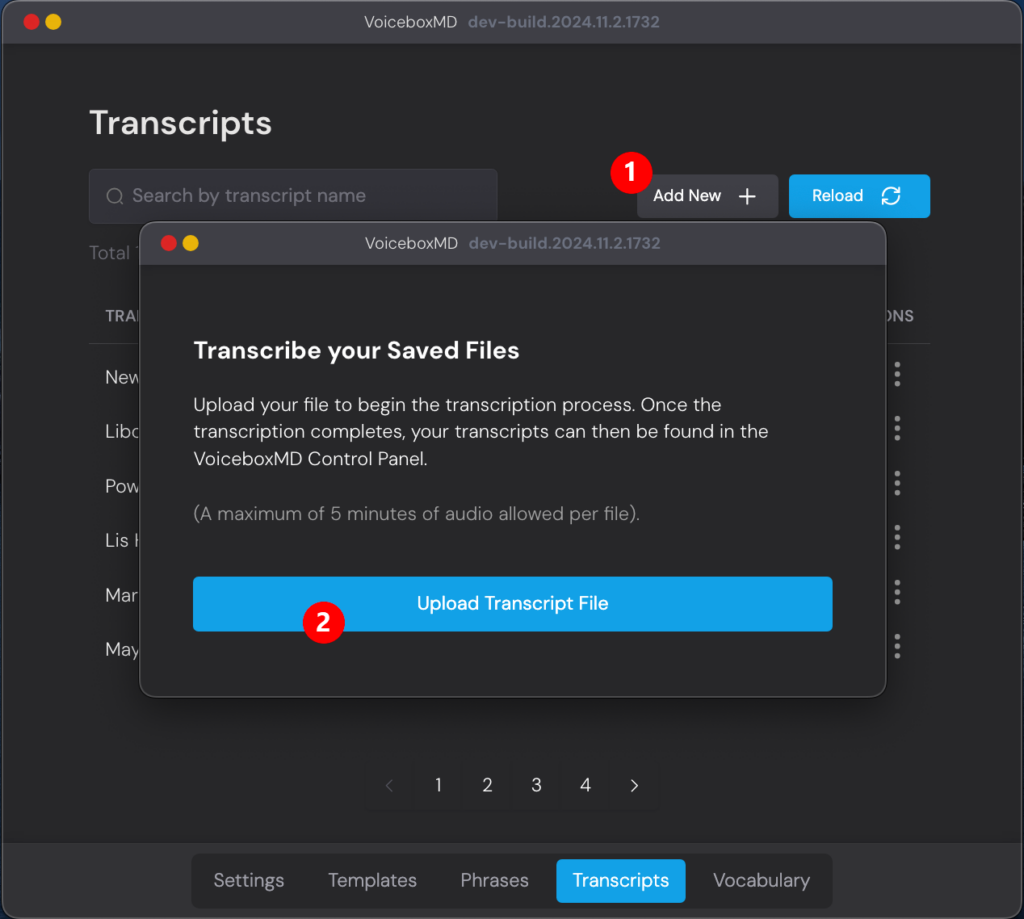
Open the Transcripts tab in the Control Panel.
Click Add New (1)
Select Upload Transcript File (2)
After the transcription is completed, the file will be listed in the Transcripts tab in the Control Panel.
To delete a transcript, click the three dots under ACTIONS and select Delete Transcript (1).
If you want to duplicate a transcript (for customization or other purposes), select Copy in the ACTIONS column (2).