You can use VoiceboxMD in three ways: creating transcripts or filling in EHR forms from scratch or populating them with pre-written content (templates), and getting VoiceboxMD to transcribe pre-recorded audio files. The processes for the first two scenarios are the same.
Dictating a new transcript or filling in a form in an EHR #
The same steps apply to transcribe audio, whether you are transcribing to a word processing document like MS Word or an EHR application like Athena Health EHR.
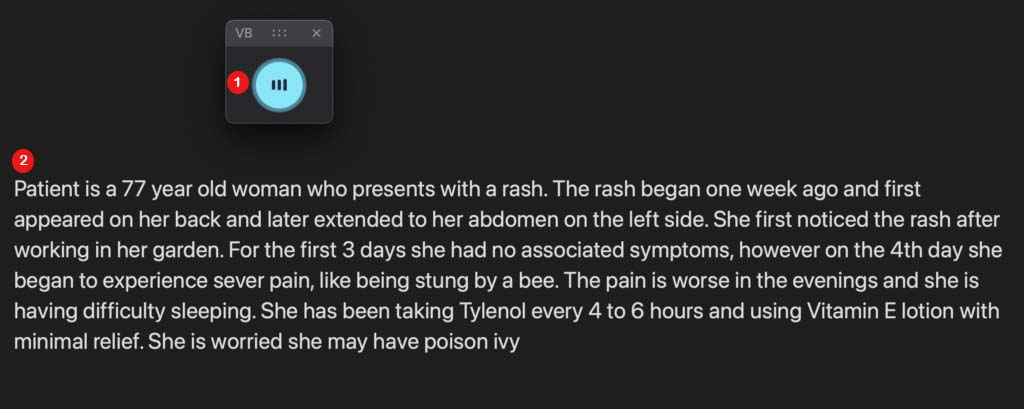
Before starting a new note in your EHR, you need to click the mic icon to start dictation (1), then start speaking. Your dictation will first appear in the VoiceboxMD Notepad (2).

Note: If the VoiceboxMD Notepad does not appear when you start dictation, it may be disabled in your settings.
Enabling the VoiceboxMD Notepad #
To enable the VoiceboxMD in-built Notepad:
- Open VoiceboxMD Settings.
- Toggle Enable Notepad to ON.
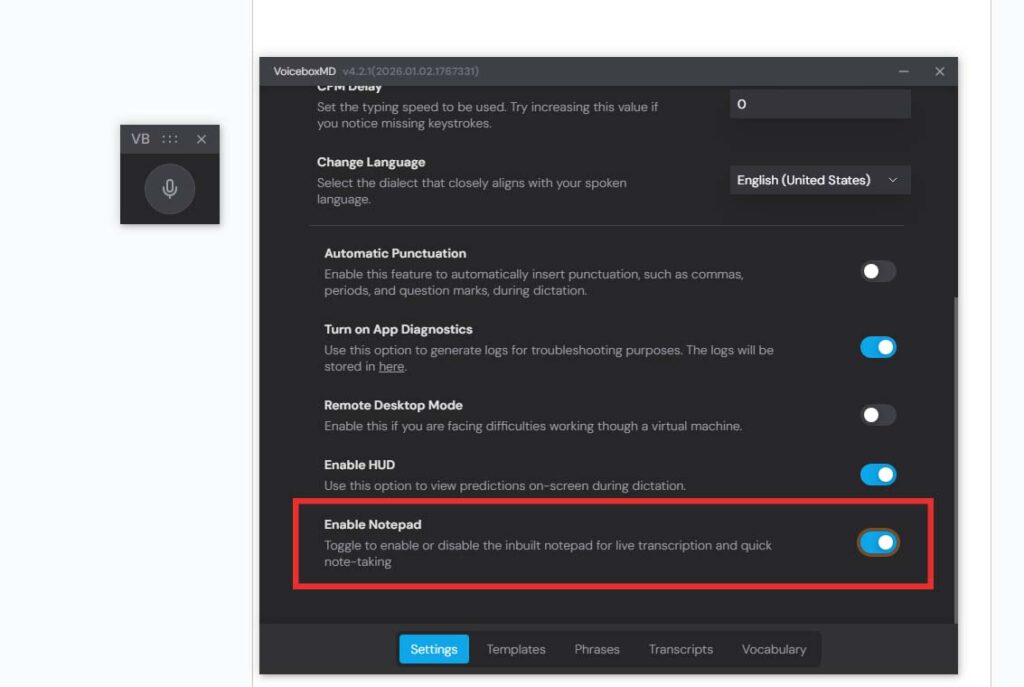
Once enabled, the Notepad will appear alongside the microphone icon and can be used for live transcription before inserting text into your EHR or document.
When you are ready to insert simply click on a text field in your EHR or Word document (2), and say “INSERT”. The dictated text will automatically appear on the text field as shown below.
You may correct errors during the transcription or when you are finished and have switched off the microphone.
Step 1 – Specify where the audio must be transcribed #
Before you start a dictation, you must open the VoiceboxMD app and click on the microphone icon. Then open the file – for instance, a word processing document or a form you wish to fill in – and place your cursor at the place where you wish VoiceboxMD to start the transcription. Once the cursor is in place and the app is activated, VoiceboxMD will start typing at that location.
Step 2 – Start dictating your audio #
To start transcribing your audio, click on the microphone in the VoiceboxMD app. It will turn blue. When you are finished, click on the microphone again to disable the listener.
VoiceboxMD supports various text formatting commands, like period, comma, new line, hyphen, and numeric list. To reduce transcription errors, you can customize VoiceboxMD’s grasp of your particular phraseology, vocabulary, and audio recognition capabilities in the Control Panel. You may also create templates to quickly insert pre-written content that you use often in different documents, e.g., your contact details.
Creating a transcript from a pre-recorded audio file #
You can upload pre-recorded audio on the Transcripts tab in the Control Panel. To do this, click on the Add New + button (1) and then click Upload Transcript File (2).
Once the transcription is complete, it will be listed on the Transcripts tab in the VoiceboxMD Control Panel.
To delete a transcript, click on the three dots in the ACTIONS column and select Delete Transcript (1).
If you would like to transcribe the transcript again (for instance, to customize it for another use), in the ACTIONS column, select Copy (2).